pocket door assembly instructions
Pocket door assembly offers a space-saving solution, blending seamlessly into walls for a modern aesthetic.
This guide details the process, from component understanding to finishing touches.
Solid core slabs enhance quality and soundproofing, requiring upgraded hardware for their added weight, as experienced installers confirm.
Custom grooved thresholds aid sound reduction and allow for easy floor renovations, secured with screws and wax putty.
Magnetic solutions prevent paint damage from guides and can help maintain the door in an open position with a slight slope.
What is a Pocket Door?
Pocket doors, also known as sliding barn doors, are a unique door system that disappears into a cavity within the wall when opened, offering a streamlined and space-saving alternative to traditional swinging doors. Unlike hinged doors, they don’t require swing space, making them ideal for smaller rooms or areas where maximizing floor space is crucial.
The system consists of a door slab that slides along a track, concealed within a framed “pocket” constructed inside the wall. This pocket is created during wall framing or can be retrofitted into existing walls, though retrofitting can be more complex. The door operates by gliding along hanging hardware, typically consisting of hangers, bolts, and guides, ensuring smooth and quiet operation.
Historically, pocket doors were common in older homes, experiencing a resurgence in popularity due to their modern aesthetic and functional benefits. They are frequently used in bathrooms, closets, and pantries, but can be incorporated into various rooms throughout the home. Choosing a solid core door enhances soundproofing, a key consideration for bathrooms or bedrooms.
Benefits of Pocket Doors
Pocket doors offer numerous advantages over conventional swinging doors, primarily centered around space optimization. Their ability to slide into the wall eliminates the need for swing space, freeing up valuable floor area, particularly beneficial in compact rooms or hallways. This makes them a practical choice for maximizing usability in smaller homes or apartments.
Beyond space-saving, pocket doors contribute to a cleaner, more modern aesthetic. Their seamless integration into the wall creates a minimalist look, enhancing the overall design of a room. Furthermore, solid core slabs significantly improve sound insulation, making them ideal for bedrooms, bathrooms, or home offices where privacy is paramount.
Installation, while requiring some carpentry skill, can increase a home’s value. Custom grooved thresholds not only aid in sound reduction but also offer a refined finish. Properly installed, with attention to door guides to prevent rubbing, they provide long-lasting, quiet operation.
Tools and Materials Required
Successfully assembling a pocket door demands a specific toolkit and material list. Essential tools include a measuring tape, level, stud finder, drill with various bits, screwdriver set, and a saw (circular or hand saw) for framing adjustments. A wrench, often supplied with the pocket door frame kit, is crucial for adjusting hanging bolts.
Materials encompass the door slab (consider solid core for soundproofing), the complete pocket door frame kit – including tracks, hangers, and jambs – and appropriate screws for secure installation. Door guides (top and bottom) are vital, alongside magnets for holding the door open.
Additional supplies include shims for leveling, wood filler for patching, sandpaper for smoothing, paint or stain for finishing, and wax putty for the custom grooved threshold. Safety gear, such as safety glasses and a dust mask, is also highly recommended throughout the entire process.

Understanding Pocket Door Components
Pocket door systems comprise a door slab, a frame kit with tracks, hanging hardware, and guides. Solid core doors offer superior sound dampening.
Proper component identification is key to a smooth installation, ensuring compatibility and functionality throughout the assembly process.
Selecting the right hanger plates and bolts is vital for supporting the door’s weight and facilitating smooth operation.
Door Slab Selection (Solid Core vs. Hollow Core)
Choosing the right door slab is fundamental to a successful pocket door installation, impacting both functionality and overall quality. Solid core doors are highly recommended, particularly for locations demanding sound insulation, such as bathrooms or lavatories.
Experienced installers consistently advocate for solid core slabs, noting their substantial feel and superior sound-blocking capabilities. However, this enhanced quality necessitates an upgrade to the hanging hardware to accommodate the increased weight. Standard hardware may struggle to support a heavier solid core door, leading to operational issues.
Conversely, hollow core doors are lighter and more economical. While suitable for less demanding applications, they offer minimal soundproofing. The choice hinges on balancing budget with performance requirements. Consider the level of privacy and noise reduction needed in the space where the pocket door will be installed. A solid core door provides a premium experience, while a hollow core door offers a cost-effective alternative.
Ultimately, prioritizing a solid core slab, coupled with appropriate hardware, delivers a more durable and satisfying pocket door solution.
Pocket Door Frame Kit Components
A comprehensive pocket door frame kit is essential for a smooth installation. These kits typically include pre-cut header, jambs, and track components, designed to create the recessed cavity for the door. Understanding each part is crucial before beginning assembly.
The header forms the top of the pocket, providing structural support and housing the track; Jambs are the vertical side pieces that define the opening. The track itself is where the door hangers travel, enabling smooth sliding action. Kits also include fasteners – screws – for assembling the frame.

Important considerations include ensuring the kit’s dimensions match your rough opening. Some kits are adjustable, offering flexibility, while others require precise measurements. Verify all components are present before starting. Compact adjustable pocket door frames are available, offering ease of installation and adaptability to various wall thicknesses.
Carefully review the manufacturer’s instructions, as component specifics can vary between brands. A well-organized kit simplifies the process and ensures a structurally sound pocket door frame.
Hanging Hardware (Hangers, Bolts, and Guides)
Hanging hardware is the core of a functional pocket door system. This includes the hangers, which attach to the door and ride along the track, hanging bolts that secure the door to the hangers, and guides that ensure smooth, stable movement.
Hangers come in various weight capacities; selecting the appropriate type for your solid core or hollow core door is vital. Hanging bolts are adjusted using a supplied wrench to fine-tune door height and alignment. Proper bolt insertion, starting with the hanger nearest the frame, is key.
Top and bottom guides prevent the door from swaying or jumping off the track. These guides should be installed carefully to avoid rubbing against the door, which can damage the paint. Consider using magnets – one on the door and one on a block below – to help hold the door open.
Quality hardware ensures quiet operation and longevity. Regularly inspect and adjust these components for optimal performance.

Preparing the Door Opening
Framing must meet specific requirements for pocket door installation, ensuring accurate dimensions and structural integrity for smooth operation.
Square and level framing is crucial; any inconsistencies will cause binding or alignment issues during the door slab installation process.
Carefully install the pocket door frame, verifying its stability before proceeding with the hanging hardware and door slab attachment.
Framing Requirements and Dimensions
Accurate framing is paramount for successful pocket door installation. The rough opening width should be 2 inches wider than the door slab itself, allowing for smooth operation within the frame. Height should be 1 inch taller than the door, facilitating adjustments during installation.
Studs flanking the opening must be plumb and securely fastened. Typically, 2×4 lumber is sufficient, but local building codes should always be consulted. Ensure the header above the opening is adequately sized to support the weight of the door and frame, preventing sagging over time.
Pocket door frame kits often specify precise dimensions; adhere to these guidelines meticulously. The depth of the pocket must accommodate the door slab when fully retracted, plus a small allowance for hardware. Precise measurements prevent frustrating adjustments later. Double-check all dimensions before proceeding, as modifications can be challenging once the frame is installed.
Consider the wall thickness when selecting a frame kit. Kits are designed for standard wall depths, and using an incompatible kit can compromise structural integrity and functionality.
Ensuring Square and Level Framing
A perfectly square and level frame is critical for smooth pocket door operation. Begin by verifying the corners of the rough opening are 90 degrees using a framing square. Any deviation will cause binding or misalignment. Shim as needed to correct imperfections before installing the frame.
Utilize a level to check both vertical studs and the header. Even slight inclines can lead to operational issues. Adjust the studs’ footing or add shims beneath the header to achieve perfect levelness. Consistent leveling ensures the door hangs correctly.
Plumbness is equally important. Use a plumb bob or level to confirm vertical alignment. Experienced installers emphasize this step, noting that even minor errors accumulate and cause significant problems. Securely fasten the frame to the studs, ensuring it remains square during the process.
Re-check squareness and levelness after securing the frame. Minor adjustments can be made at this stage, but significant corrections may require disassembly and rebuilding.
Installing the Pocket Door Frame
Begin by carefully positioning the pocket door frame within the prepared opening, ensuring it’s flush with the wall’s finished surface. Secure the frame temporarily with clamps or shims to maintain its position during installation.
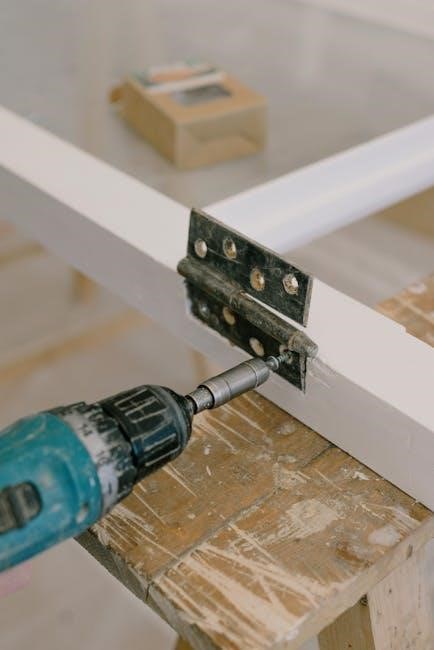
Fasten the frame to the studs using appropriate screws, ensuring they penetrate deeply enough for a secure hold. Pre-drilling pilot holes prevents wood splitting and facilitates easier screw insertion. Maintain consistent spacing between fasteners for even distribution of stress.
Pay close attention to the manufacturer’s instructions regarding specific screw placement and frame alignment. Compact adjustable pocket door frames require precise installation for optimal functionality.
Double-check the frame’s squareness and levelness after securing it. Make any necessary adjustments before proceeding to the next step. A properly installed frame is the foundation for a smoothly operating pocket door.

Installing the Door Slab
Attach hanger plates securely to the door slab, then insert hanging bolts into these plates, starting with the plate closest to the frame.
Adjust bolts using the provided wrench to achieve proper height and alignment, ensuring smooth gliding within the pocket door frame.
Precise adjustments are crucial for preventing binding and ensuring the door operates flawlessly, offering a seamless transition into the wall cavity.
Attaching Hanger Plates to the Door
Carefully position the hanger plates on the door slab, ensuring they are equidistant from the edges and aligned with the pre-drilled holes, if available. Precise placement is vital for balanced weight distribution and smooth operation.
Use appropriate screws – typically provided in the pocket door frame kit – to securely fasten the hanger plates. Avoid over-tightening, which could strip the screw holes or damage the door slab, especially with hollow core doors.
Double-check that all hanger plates are firmly attached and level before proceeding. A wobbly plate will translate to an uneven door and potential operational issues. Consider using a level to verify alignment.
For solid core doors, pre-drilling pilot holes is highly recommended to prevent splitting the wood. Solid core slabs, while offering superior soundproofing, require more effort during installation due to their weight and density.
Inspect the attachment points after securing the plates, ensuring there are no gaps or loose screws. A solid connection between the hanger plates and the door is paramount for long-term reliability.
Inserting Hanging Bolts into Hanger Plates
Begin with the hanger plate closest to the pocket door frame, carefully inserting the hanging bolt through the plate and into the corresponding track within the frame. Ensure the bolt is fully seated within the track before applying any force.
Utilize the supplied wrench to tighten the bolt, adjusting its position to engage the track securely. Avoid excessive tightening, as this can hinder smooth operation and potentially damage the track or hanger plate.
Repeat this process for the remaining hanger plates, working systematically across the door. Consistent adjustment of each bolt is crucial for maintaining a level and properly aligned door.
Periodically check the door’s alignment as you insert each bolt. Minor adjustments at this stage can prevent significant issues later on. A slight slope can help the door stay open.
Confirm that all bolts are firmly secured and the door hangs freely within the track. A properly installed door will move smoothly with minimal resistance, showcasing a successful installation.
Adjusting Door Height and Alignment
Fine-tune the door’s height by utilizing the adjustment mechanisms on the hanger plates. Small, incremental turns of the wrench will raise or lower the door, allowing for precise leveling. Continuously monitor the gap between the door and the floor, striving for a consistent and minimal clearance.
Address any misalignment by adjusting the bolts individually. Uneven tightening can cause the door to bind or rub against the frame. Observe the door’s movement carefully, identifying areas of friction or resistance.
Ensure the door slides smoothly throughout its entire range of motion. A slight slope can assist in keeping the door open, though some bounce-back may occur. Avoid forcing the door, as this could damage the hardware or frame.
Check for squareness by measuring the diagonal distances of the door opening. Adjustments may be needed to ensure the door sits flush within the frame. Patience and precision are key to achieving optimal results.

Finalize adjustments once the door operates smoothly and aligns correctly. Regularly inspect the hardware for tightness and wear, ensuring long-term functionality.
Installing Door Guides

Door guides, placed top and bottom, ensure smooth travel and prevent wobble. Careful placement avoids paint rubbing, preserving the door’s finish and appearance.
Magnets, one on the door and one on a block below, can help hold the door securely open, offering a simple solution.
Proper installation is crucial for preventing damage and maintaining the door’s functionality throughout its lifespan.
Top and Bottom Guide Placement
Precise guide placement is paramount for smooth pocket door operation. The top guide, typically integrated into the track system, requires careful alignment with the header framing to ensure the door travels straight and doesn’t bind. It should allow for free movement without excessive play.
The bottom guide, however, demands more attention to detail. It’s crucial to position it correctly within the floor track or groove to prevent rubbing and potential paint damage. A slight upward angle can be beneficial, assisting in keeping the door open, though some bounce-back may occur.
Consider the floor covering; install the guide before flooring to ensure a flush fit. Custom grooved thresholds, attached with screws and wax putty for easy removal, are highly recommended for soundproofing and a professional finish. Accurate measurements and a level surface are essential for both guide installations, guaranteeing a seamless and quiet sliding action.
Preventing Guide Rubbing and Paint Damage
Minimizing friction between the door and guides is vital for longevity and quiet operation. Guide rubbing can quickly mar the door’s finish, necessitating touch-ups or even refinishing. Careful installation, ensuring perfect alignment, is the first defense.
Lubrication of the guides with silicone-based spray can further reduce friction. Adjustments to the hanger bolts allow for fine-tuning of the door’s position, eliminating contact points. Consider using felt or nylon strips on the guide surfaces for added protection.
A clever solution involves strategically placed magnets – one on the door’s bottom and another on a block below. This gently pulls the door away from the guide, preventing contact. Prioritize a smooth, consistent surface on both the door and guides to avoid abrasive interactions and maintain a pristine appearance throughout the door’s lifespan.
Using Magnets to Hold Door Open
Maintaining an open position with pocket doors can be challenging due to slight slopes or imbalances. A simple yet effective solution involves incorporating magnets into the system. This method offers a subtle, non-mechanical way to counteract the natural tendency of the door to drift closed.
Install one magnet on the bottom of the door and a corresponding magnet on a small wooden block positioned just below the door’s resting point within the pocket. The attractive force between these magnets will gently hold the door open, overcoming minor gravitational pulls.
Ensure the magnets are strong enough to provide sufficient holding power, but not so strong that they impede smooth closing. This technique works best when combined with a latching handle for secure closure, offering both convenience and control.

Addressing Common Issues
Troubleshooting pocket doors often involves sticking, binding, or failure to stay open; adjustments to hardware and framing are key to resolution.
Soundproofing can be improved with solid core doors and custom thresholds, minimizing sound transmission between rooms for enhanced privacy.
Guide rubbing against the door can be prevented with careful alignment and, if necessary, adjustments to the guide’s position or the door’s slope.
Door Sticking or Binding
Door sticking or binding is a frequent issue during pocket door assembly, often stemming from misalignment within the frame or improper hardware adjustment. Begin by meticulously inspecting the door’s path, identifying points of contact causing friction.
Carefully examine the hanging bolts and ensure they are fully seated within the hanger plates, allowing for smooth travel along the track. Utilize the supplied wrench to fine-tune bolt adjustments, raising or lowering the door incrementally until it moves freely.
Pay close attention to the door guides, both top and bottom; ensure they aren’t exerting excessive pressure against the door slab. If rubbing occurs, slightly loosen the guide’s mounting screws and reposition it for optimal alignment. Remember, preventing guide rubbing protects the paint finish.
A slight slope can sometimes aid in keeping the door open, but excessive angling can contribute to binding; Thoroughly check the framing for squareness and levelness, as even minor deviations can exacerbate these problems. Consistent adjustments are often needed for optimal performance.
Door Not Staying Open
If your pocket door consistently fails to remain open, the issue often relates to insufficient holding force or a lack of a positive latching mechanism. A common and effective solution involves strategically placed magnets.
Position one magnet on the bottom of the door and another on a block mounted just below the door’s open position within the pocket. This creates a magnetic attraction, gently holding the door in place. Ensure the magnets are strong enough to overcome gravity but not so powerful as to hinder closing.
Alternatively, consider a slight incline during installation. A very subtle slope can encourage the door to rest against the strike side, utilizing gravity to maintain its open position. However, be mindful of potential “bounce back.”
Crucially, a reliable latching handle is essential for keeping the door securely closed, but it doesn’t directly address the open-position issue. Combining magnets with a slight incline often provides the most consistent results.
Soundproofing Considerations (Thresholds & Solid Core Doors)
Achieving effective sound isolation with a pocket door requires attention to both the door slab material and the sealing of the door’s perimeter. Solid core doors are significantly superior to hollow core options in blocking sound transmission, offering a much more substantial barrier.
However, even a solid core door needs a proper seal. A custom grooved threshold is vital; it creates a tight closure point at the bottom of the door, preventing sound leakage. This threshold should be securely screwed in place, similar to the jambs, but remain removable for future flooring work.
Employing wax putty around the threshold’s attachment points further enhances the seal, filling any gaps. Remember that even small openings can compromise soundproofing efforts.
Upgrading the hanging hardware to accommodate the weight of a solid core door is also crucial for smooth operation and optimal sound dampening.

Finishing Touches
Trim and casing installation completes the aesthetic, concealing the frame. Wax puttying the threshold allows for easy removal during flooring projects, ensuring future flexibility.
Custom grooved thresholds provide a seamless, sound-reducing closure, enhancing both functionality and the overall quality of the installation.
These final steps deliver a polished look and long-term practicality for your pocket door.
Installing Trim and Casing
Trim and casing are crucial for concealing the pocket door frame and creating a finished, integrated look within the wall. Begin by measuring and cutting the casing to fit snugly around the door opening, ensuring accurate miters at the corners for a professional appearance.
Apply construction adhesive to the back of the casing and carefully position it against the frame. Secure the casing using finishing nails, countersinking them slightly below the surface. Repeat this process for all sides of the door opening.
Pay close attention to the reveal – the small gap between the casing and the door slab – ensuring it’s consistent around the entire perimeter. This consistency contributes to a clean, polished aesthetic. Fill any nail holes with wood filler, allow it to dry, and sand smooth before priming and painting or staining the trim to match your décor.
Consider using a backer rod behind the trim to provide additional support and prevent movement over time. Proper trim installation not only enhances the visual appeal but also contributes to the structural integrity of the pocket door system.
Custom Grooved Thresholds
Custom grooved thresholds significantly enhance pocket door functionality, particularly regarding sound isolation and smooth operation. Unlike standard thresholds, these are specifically crafted to accommodate the door slab’s lower edge as it slides within the opening.
Begin by accurately measuring the width of the door opening and the depth of the groove required for the door to slide freely. Construct the threshold from durable hardwood, ensuring it’s precisely routed to create a seamless track for the door.
Secure the threshold to the floor using screws, similar to the jamb installation, allowing for future removal if flooring adjustments are needed. A crucial step involves applying wax putty around the screw heads and along the threshold edges.
This wax putty provides a removable quality, simplifying floor renovations without damaging the threshold. The custom groove minimizes drafts and sound transmission, creating a more comfortable and private space, especially beneficial for bathrooms or lavatories.
Wax Puttying for Removability
Wax puttying is a critical, often overlooked, step in pocket door installation, ensuring future flexibility and ease of maintenance. It’s primarily used around the screws securing the threshold and, optionally, along the threshold’s edges where it meets the flooring.
The purpose isn’t simply cosmetic; it creates a non-permanent bond. Applying a generous amount of wax putty around each screw head allows for straightforward removal when future flooring changes or repairs are necessary.
Similarly, a bead of wax putty along the threshold’s sides prevents it from adhering to the subfloor, further simplifying removal. Choose a high-quality wax putty formulated for woodworking, ensuring it remains pliable yet provides sufficient hold during normal use.
This technique safeguards against damage during renovations, saving time and potential repair costs. It’s a small detail that demonstrates foresight and contributes to a professional, long-lasting installation.