cumberland gap ham cooking instructions
Understanding Cumberland Gap Ham
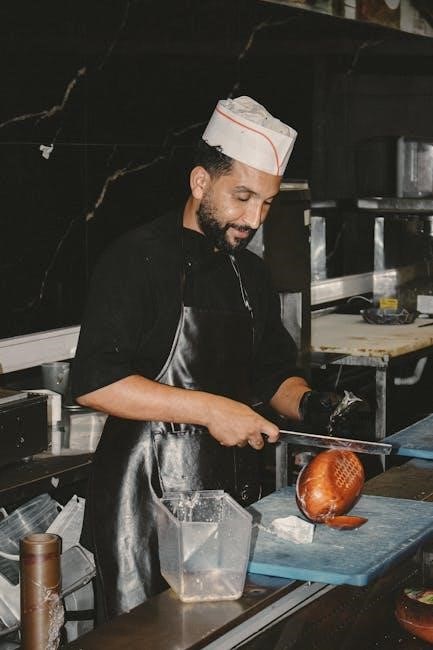
Cumberland Gap Ham offers a unique culinary experience, detailed cooking instructions ensure a flavorful result. This guide covers various methods, from oven baking to smoking techniques.
Cooking a Cumberland Gap Ham is simple, yielding juicy, delicious results. Elevate your meals with this sought-after ingredient, perfect for both classic and modern recipes!
What is Cumberland Gap Ham?
Cumberland Gap Ham is a regionally prized cured pork product, celebrated for its distinctive flavor profile and tender texture. Originating from the Cumberland Gap region, this ham undergoes a specific curing process, often involving dry-curing and smoking, contributing to its unique taste.
It’s frequently enjoyed during holidays and special occasions, offering a substantial and flavorful centerpiece. Preparing a Cumberland Gap Ham involves several cooking methods – oven baking, slow cooking, smoking, and grilling – each yielding slightly different results.
The ham’s versatility allows for pairing with various sides and glazes, enhancing its already delicious character. A semi-boneless variety is popular, offering convenience without sacrificing flavor.
History and Origin of Cumberland Gap Ham
The Cumberland Gap Ham’s history is deeply rooted in the Appalachian region, specifically around the Cumberland Gap, a historic passageway through the mountains. Early settlers and pioneers relied on curing meats, like ham, as a vital method of preservation before refrigeration.
Traditional curing techniques, passed down through generations, involved salt, sugar, and often smoking over local hardwoods. This process not only preserved the meat but also imparted a unique, smoky flavor.
Over time, the ham gained regional recognition for its quality and taste, becoming a staple in local cuisine. Today, it continues to be a cherished culinary tradition, enjoyed for its rich heritage and delicious flavor.
Types of Cumberland Gap Ham Available
Cumberland Gap Ham comes in several varieties to suit different preferences. You’ll commonly find fully cooked, semi-boneless, and bone-in options. Fully cooked hams are ready to heat and serve, offering convenience. Semi-boneless hams provide a good balance of meat and ease of carving.
Bone-in hams deliver a richer flavor due to the bone’s contribution during cooking, though they require more carving effort. Variations also exist in curing styles, impacting saltiness and smokiness. Some are dry-cured, while others are wet-cured, influencing the final texture and taste.

Preparing the Ham for Cooking
Proper preparation is key for a delicious Cumberland Gap Ham. This involves rinsing, optional scoring, and considering brining or marinating for enhanced flavor.
Rinsing and Trimming the Ham
Before cooking your Cumberland Gap Ham, begin with a thorough rinse under cold water. This removes any surface impurities or excess salt from the curing process. Pat the ham dry with paper towels – a dry surface promotes better glaze adhesion later on.
Next, carefully trim any excess fat. While some fat contributes to flavor and moisture, too much can make the ham overly greasy. You can leave a thin layer (about ¼ inch) for optimal results.
Inspect the ham for any remaining skin or rind and remove it if present. A sharp knife is helpful for this step. Proper rinsing and trimming set the stage for a beautifully cooked and flavorful ham!
Scoring the Ham (Optional)
Scoring the ham is an optional, yet beneficial step, particularly for hams with a thicker fat cap. Using a sharp knife, carefully cut a diamond pattern across the surface of the fat. These cuts should be about ¼ to ½ inch deep, without penetrating the meat itself.
Scoring allows the heat to penetrate more effectively, rendering the fat and creating a more flavorful, crispy exterior. It also provides pockets for glaze to seep into, enhancing the overall taste experience.
Remember, scoring is not essential, but it elevates the final product, adding both visual appeal and improved texture.
Brining or Marinating (Optional)
Brining or marinating a Cumberland Gap Ham is optional, as these hams are typically pre-cured. However, it can enhance moisture and flavor, especially for leaner cuts. A simple brine consists of water, salt, sugar, and spices, soaking the ham for 12-24 hours.
Marinating, using ingredients like honey, mustard, or fruit juices, offers a different flavor profile. Both methods help the ham retain moisture during cooking, resulting in a juicier final product.
Consider your desired flavor when deciding whether to brine or marinate.
Oven Cooking Instructions
Oven baking is a classic method for Cumberland Gap Ham. Determining cooking time depends on the ham’s weight, while temperature guidelines ensure a perfectly cooked, flavorful result.
Determining Cooking Time Based on Weight
Calculating cooking time for your Cumberland Gap Ham is crucial for a perfectly cooked result. Generally, allow approximately 15-18 minutes per pound for a ham that’s already fully cooked. However, this timeframe applies to a standard oven temperature of 325°F (163°C).
For larger hams, exceeding 10 pounds, consider reducing the cooking time slightly to prevent drying. Always use a reliable meat thermometer to verify the internal temperature, rather than solely relying on time estimations. Remember, these are guidelines; individual ovens may vary. Consistent monitoring ensures a moist and flavorful ham!
Oven Temperature Guidelines
Maintaining the correct oven temperature is vital when cooking your Cumberland Gap Ham. A consistent 325°F (163°C) is generally recommended for optimal results, ensuring even heating throughout the ham. Lower temperatures, around 300°F, can be used for longer, slower cooking, potentially enhancing moisture retention.
Avoid temperatures exceeding 350°F, as this may lead to a dry exterior before the center is adequately heated. Regularly check your oven’s accuracy with an oven thermometer. Consistent temperature control is key to achieving a tender, juicy, and flavorful ham!
Glaze Recipes for Oven-Baked Ham
Elevate your Cumberland Gap Ham with a delightful glaze! A classic Brown Sugar glaze combines 1 cup packed brown sugar, ½ cup honey, and 2 tablespoons Dijon mustard. For a tangy twist, try a Pineapple-Glazed Ham: mix 1 cup pineapple juice, ½ cup brown sugar, and ¼ cup honey.
Another option is a Maple-Mustard glaze, blending ½ cup maple syrup, ¼ cup Dijon mustard, and a dash of cinnamon. Apply the glaze during the last 30-45 minutes of cooking, brushing it on every 10-15 minutes for a caramelized finish!
Slow Cooker Method
Slow cooking a Cumberland Gap Ham is incredibly easy! A simple recipe utilizes a semi-boneless ham, brown sugar, and optional glaze ingredients for a flavorful meal.
Slow Cooker Ham Recipe Ingredients
For a delightful slow cooker Cumberland Gap Ham, you’ll need a few key ingredients to unlock its full potential. Start with one semi-boneless Cumberland Gap cooked ham, ideally weighing between 4 to 8 pounds – this size fits most slow cookers comfortably.
Next, incorporate 1 cup of brown sugar, which will caramelize beautifully during the slow cooking process, creating a subtly sweet and wonderfully sticky glaze. Don’t hesitate to get creative with optional glaze additions! Consider honey for extra sweetness, mustard for a tangy kick, or even more brown sugar for intensified caramelization.
These simple components combine to create a truly memorable and effortless ham dish.
Slow Cooking Time and Temperature
Slow cooking a Cumberland Gap Ham is remarkably straightforward. Begin by placing your prepared ham into the slow cooker. The ideal temperature setting is low – this gentle heat ensures the ham remains incredibly moist and tender throughout the cooking process.
For a 4-6 pound ham, plan for approximately 4-6 hours of cooking time. Larger hams, weighing 6-8 pounds, may require 6-8 hours. Remember, the goal isn’t to cook the ham (as it’s pre-cooked), but to warm it through and infuse it with flavor.
Regularly check for desired warmth and tenderness!
Adding Glaze in the Slow Cooker
Glazing your Cumberland Gap Ham while slow cooking elevates the flavor profile significantly. You can add your chosen glaze – a blend of brown sugar, honey, and mustard is popular – during the last 1-2 hours of cooking.
Pour the glaze evenly over the ham, ensuring it’s well coated. For a richer, more caramelized finish, baste the ham with the glaze from the slow cooker’s juices every 30 minutes during this final stage.
This repeated basting creates a beautiful, sticky, and incredibly flavorful crust!
Smoking Cumberland Gap Ham
Smoking Cumberland Gap Ham imparts a delicious, smoky flavor. Selecting the right wood chips, maintaining proper temperature, and using a water pan are crucial for success.
Wood Chip Selection for Smoking
Choosing the right wood chips is paramount when smoking a Cumberland Gap Ham, significantly impacting the final flavor profile. Hickory is a classic choice, lending a robust, traditional smoky taste that complements the ham’s saltiness beautifully. Applewood offers a milder, sweeter smoke, ideal for those preferring a less intense flavor.
Cherry wood imparts a fruity sweetness and a lovely reddish hue to the ham. For a more complex flavor, consider a blend of woods – perhaps hickory and applewood. Avoid using softwoods like pine or fir, as they can produce a bitter, resinous smoke. Ensure the wood chips are thoroughly soaked in water for at least 30 minutes before use to promote smoldering rather than flaming;
Smoking Temperature and Time
Maintaining a consistent temperature is crucial for perfectly smoked Cumberland Gap Ham. Aim for a smoking temperature between 225°F and 250°F (107°C ౼ 121°C). This low and slow approach allows the smoke to penetrate the ham deeply, creating a rich, smoky flavor without drying it out.
Smoking time will vary depending on the ham’s weight. Generally, allow approximately 6-8 hours for a fully cooked ham. Use a meat thermometer to monitor the internal temperature, aiming for 145°F (63°C). Regularly replenish the wood chips to maintain a consistent smoke flavor throughout the cooking process.
Preparing a Water Pan for Smoking
Utilizing a water pan during smoking is vital for maintaining moisture and preventing the Cumberland Gap Ham from drying out. Place a pan filled with water directly beneath the ham inside the smoker. The evaporating water creates a humid environment, ensuring a juicier, more tender final product.
Replenish the water pan as needed throughout the smoking process – typically every hour or two. This consistent humidity also helps the smoke adhere to the ham’s surface, enhancing the smoky flavor. A water pan is a simple step with a significant impact on the quality of your smoked ham!
Grilling Cumberland Gap Ham
Grilling offers a quick, flavorful way to cook Cumberland Gap Ham. Precise temperature control and glazing techniques are key to achieving a delicious, caramelized result.
Grilling Temperature Control
Maintaining consistent temperature is crucial when grilling Cumberland Gap Ham. Begin with indirect heat, around 250-275°F (121-135°C), to allow the ham to heat through without burning. Utilize a two-zone fire, keeping coals or burners primarily on one side of the grill.
Monitor the grill temperature closely using a reliable thermometer. Adjust vents or burner settings as needed to maintain the desired range. Avoid exceeding 300°F (149°C) to prevent the glaze from scorching before the ham is fully warmed.
For the final 15-20 minutes, you can briefly increase the heat to medium to caramelize the glaze, but watch carefully to avoid charring. Consistent monitoring ensures a perfectly grilled ham!
Grilling Time and Techniques
Grilling time for Cumberland Gap Ham depends on its weight and whether it’s fully cooked or needs heating. A fully cooked ham typically requires 10-15 minutes per pound, while a uncooked ham will need significantly longer, closer to oven-baking times.
Place the ham on the cooler side of the grill, away from direct heat, initially. Rotate occasionally for even warming. For a beautiful presentation, score the ham’s surface in a diamond pattern before grilling.
Basting with glaze during the last 30 minutes adds flavor and a glossy finish. Remember to use indirect heat primarily to prevent burning!
Glazing While Grilling
Glazing a Cumberland Gap Ham while grilling elevates its flavor profile, creating a caramelized, sticky-sweet crust. Begin applying your chosen glaze during the final 30-45 minutes of grilling. Frequent basting – every 10-15 minutes – is key to building up layers of deliciousness.
Brown sugar-based glazes work exceptionally well, complementing the ham’s saltiness. Consider incorporating honey, mustard, or even fruit preserves for unique variations.
Be mindful of flare-ups caused by the sugar content; keep a spray bottle of water nearby to control them. Consistent attention ensures a perfectly glazed ham!
Internal Temperature and Safety
Ensuring a safe internal temperature is crucial when cooking Cumberland Gap Ham. Utilize a meat thermometer for accurate readings, prioritizing food safety and delicious results!
Using a Meat Thermometer
Employing a meat thermometer is paramount for guaranteeing your Cumberland Gap Ham reaches a safe and delectable internal temperature. Insert the thermometer into the thickest part of the ham, avoiding bone, fat, or gristle for an accurate reading. Digital thermometers provide quick and precise results, while dial thermometers are also effective.
Regularly monitor the temperature throughout the cooking process, especially during the final stages. Consistent checking prevents overcooking, which can lead to dryness, and ensures the ham is thoroughly heated. Remember, accurate temperature monitoring is a cornerstone of food safety and a perfectly cooked ham!
Safe Internal Temperature for Ham
Ensuring your Cumberland Gap Ham reaches a safe internal temperature is crucial for preventing foodborne illness. According to food safety guidelines, fully cooked hams require reheating to 140°F (60°C) as measured with a food thermometer. This applies to both oven-baked, slow-cooked, and smoked hams.
However, if the ham is labeled as “fully cooked” and you’re simply warming it, 140°F is sufficient. For hams that haven’t been previously cooked, a higher internal temperature of 165°F (74°C) is necessary. Always verify with a reliable thermometer for peace of mind and a safe, delicious meal!
Food Safety Guidelines
Maintaining proper food safety when handling Cumberland Gap Ham is paramount. Always wash your hands thoroughly with soap and water before and after handling raw ham. Prevent cross-contamination by using separate cutting boards and utensils for ham and other foods.
Refrigerate leftover ham promptly, within two hours of cooking. Store it in airtight containers to maintain freshness and prevent bacterial growth. Never leave ham at room temperature for extended periods. Following these guidelines ensures a safe and enjoyable dining experience for you and your guests!

Serving and Carving
Allow the Cumberland Gap Ham to rest before carving, ensuring juicy slices. Techniques vary based on bone-in or semi-boneless cuts for optimal presentation.
Resting the Ham Before Carving
Allowing your Cumberland Gap Ham to rest is a crucial step often overlooked, yet it significantly impacts the final juiciness and tenderness of the meat. After removing the ham from the oven, smoker, or slow cooker, tent it loosely with aluminum foil.
This resting period, typically between 20 to 30 minutes, allows the juices to redistribute throughout the ham. Without this rest, all those flavorful juices will escape when you begin carving, resulting in a drier final product.
Think of it like letting a steak rest – the principle is the same! Patience is key for a truly exceptional Cumberland Gap Ham experience.
Carving Techniques for Different Ham Types
Carving a Cumberland Gap Ham depends on whether it’s bone-in or semi-boneless. For bone-in hams, start by carving slices against the grain, following the natural curve of the bone. Remove the leg portion first, then slice downwards.
Semi-boneless hams are easier; simply slice across the ham, maintaining even thickness – about ¼ to ½ inch. Always use a long, sharp carving knife for clean cuts.
If you encounter the bone, carefully run your knife along it to release the meat. Presentation matters; arrange the slices attractively on a platter!
Serving Suggestions and Pairings
Cumberland Gap Ham’s savory flavor lends itself to diverse pairings! Consider serving it with classic sides like scalloped potatoes, green bean casserole, or roasted vegetables. Pineapple slices and a cherry glaze create a delightful sweet-and-savory contrast.
For a complete meal, pair ham with pasta salads, rice pilaf, or hearty breads. Fruit chutneys and mustards enhance the flavor profile. Don’t forget beverages – a crisp white wine or a light-bodied red complements the ham beautifully.
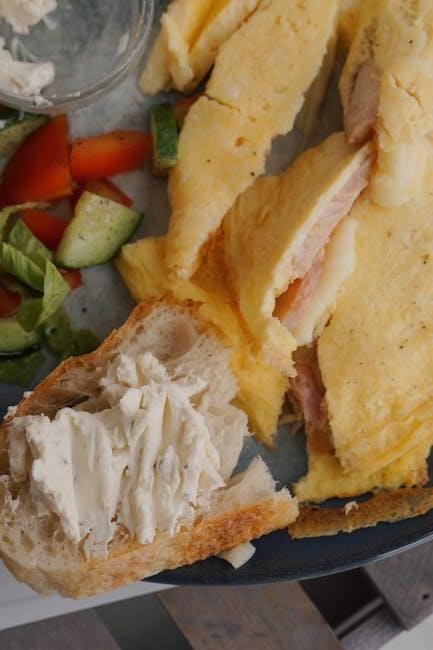
Leftover ham is fantastic in sandwiches, omelets, or quiches!

Storing Leftover Ham
Proper storage maintains Cumberland Gap Ham’s freshness. Use airtight containers for refrigeration or freezing, ensuring optimal flavor and quality for future enjoyment.
Proper Storage Containers
Selecting the right containers is crucial for preserving the quality of your leftover Cumberland Gap Ham. Opt for airtight options like heavy-duty resealable plastic bags or shallow, airtight containers. These minimize air exposure, preventing drying and flavor loss.
Avoid using containers that are too large, as this introduces more air. Wrap the ham tightly in plastic wrap before placing it in the chosen container for an extra layer of protection. Glass containers are also suitable, but ensure they have tight-fitting lids;
Properly sealed containers maintain the ham’s moisture and prevent it from absorbing odors from other foods in the refrigerator.
Refrigeration and Freezing Guidelines
Refrigerate leftover Cumberland Gap Ham promptly, within two hours of cooking. Store it at 40°F (4°C) or below. Properly stored, refrigerated ham remains safe for 3-5 days. For longer preservation, freezing is an excellent option.
Wrap the ham tightly in freezer-safe plastic wrap, then place it in a freezer bag, removing as much air as possible. Frozen ham can maintain quality for 1-2 months, though it’s still safe to eat beyond that timeframe. Thaw frozen ham in the refrigerator, not at room temperature, for optimal safety.
How Long Does Cooked Ham Last?
The longevity of cooked Cumberland Gap Ham depends heavily on proper storage. Refrigerated, cooked ham generally remains safe and palatable for 3 to 5 days. Always ensure it’s stored at 40°F (4°C) or below to inhibit bacterial growth.
For extended storage, freezing is ideal. Properly wrapped, frozen ham can last for 1-2 months, maintaining good quality. While safe to consume beyond this period, texture and flavor may diminish. Always thaw ham safely in the refrigerator before reheating and consuming for optimal enjoyment.