hoover washing machine user manual
Hoover Washing Machine User Manual: A Comprehensive Guide (Updated 12/20/2025)
Welcome! This manual guides you through using your Hoover H-Wash 350, capable of a 10kg load in 59 minutes – perfect for busy lifestyles.
Congratulations on choosing a Hoover washing machine! This appliance is designed to provide efficient and reliable laundry care for your household. Specifically, you now own the H-Wash 350 H3WPS4106TMB6-80 model, a machine engineered for modern living.

This user manual serves as a comprehensive guide to ensure optimal performance and longevity of your new washing machine. We’ll cover everything from initial setup and understanding the various wash programs, to utilizing special features and performing routine maintenance.
The H-Wash 350 boasts a generous 10kg capacity and a remarkably quick 59-minute wash cycle, ideal for families and individuals with demanding schedules. Familiarize yourself with this manual to unlock the full potential of your Hoover appliance and enjoy consistently clean laundry.
Safety Precautions
Important Safety Information: Before operating your Hoover washing machine, carefully read and understand all safety precautions outlined in this manual. Ignoring these warnings could result in personal injury or damage to the appliance.

This machine is intended for household use only. Do not use it for commercial purposes. Always ensure the machine is properly installed and grounded according to the instructions. Never attempt to repair the appliance yourself; contact a qualified technician for assistance.
Keep children and pets away from the washing machine during operation. Do not overload the drum, and always follow the recommended detergent dosage. Disconnect the power supply before cleaning or performing maintenance.
General Safety Warnings
Caution: To ensure safe operation, always supervise children near the washing machine. Never allow them to play with the controls or climb inside the drum. Avoid contact with the drum during operation, especially when spinning, as it can cause injury.

Do not wash items that have been soaked in flammable liquids. Inspect pockets for objects like coins or keys before loading laundry. Ensure proper ventilation in the laundry room to prevent moisture buildup.
If the machine malfunctions, immediately disconnect the power supply and contact customer support. Never attempt to operate the appliance if it is damaged or not functioning correctly. Regular maintenance is crucial for safe and efficient operation.
Electrical Safety
Important: This appliance must be properly grounded to prevent electric shock. Never operate the washing machine with a damaged power cord or plug. If the cord is damaged, it must be replaced by a qualified technician.
Avoid using extension cords or adapters, as they can overheat and pose a fire hazard. Ensure the voltage of your power supply matches the specifications listed on the appliance’s rating label. Do not expose the machine to rain or moisture.
Always unplug the washing machine before cleaning or performing maintenance. Never attempt to repair the appliance yourself; contact authorized service personnel for assistance.
Child Safety
Caution: Children should never be allowed to operate or play with this washing machine. Close supervision is essential when the appliance is in use near children. Keep all packaging materials, such as plastic bags, out of reach of children to avoid suffocation hazards.
The washing machine door can become hot during operation; instruct children to avoid touching it. Do not allow children to climb on or hang from the appliance. Always lock the control panel when not in use to prevent accidental activation.
Detergent and fabric softener are harmful if swallowed; keep them securely stored away from children.
Machine Overview & Components
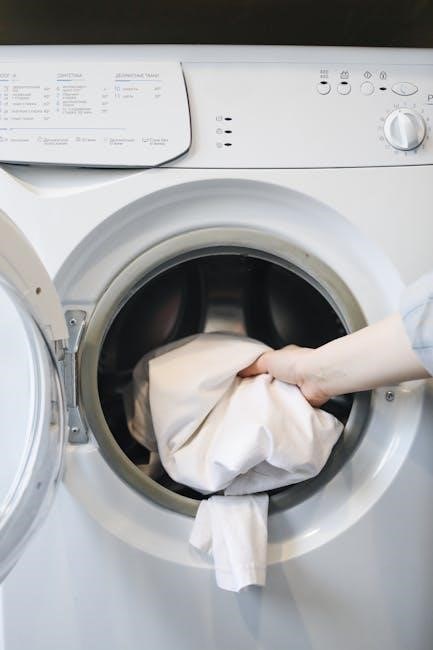
Familiarize yourself with your Hoover H-Wash 350! The machine features a robust drum designed for 10kg loads. Key components include the front control panel, providing access to wash programs and settings. Locate the detergent drawer, typically positioned on the top left, for dispensing detergent, fabric softener, and bleach.
The drum itself is easily accessible through the front-loading door. A filter, crucial for preventing blockages, is usually located behind a small access panel at the bottom front of the machine. The rear panel houses the water inlet and drain hoses, alongside the power cable.
Front Panel Controls Explained
Navigating the control panel is simple! A central dial selects your desired wash program – Cotton, Synthetics, Delicates, and Quick Wash are standard options. Digital displays clearly show the selected program, remaining time, and temperature. Dedicated buttons allow for adjustments to spin speed and temperature, tailoring each wash to your needs.
Additional buttons activate special features like Delay Start, enabling convenient scheduling. Indicator lights illuminate to signal the machine’s status – washing, rinsing, spinning, or completion. The ‘Start/Pause’ button initiates or temporarily halts the cycle.
Detergent Drawer & Dispenser
The detergent drawer is typically divided into three compartments. Marked with Roman numerals, compartment I is for pre-wash detergent – use only when selecting a pre-wash program. Compartment II accepts main wash detergent, powder or liquid, depending on your preference. Compartment III houses fabric softener; do not exceed the maximum fill line.
Ensure the drawer is fully inserted after loading. Some models feature an automatic dispenser, releasing detergent at the optimal time during the cycle. Regularly cleaning the drawer prevents residue buildup and ensures efficient detergent distribution.
Drum & Filter Location
Your Hoover washing machine features a stainless steel drum designed for durability and hygiene. The drum’s capacity is clearly indicated – typically 10kg for the H-Wash 350 model. Avoid overloading to ensure optimal cleaning performance and prevent damage.
The filter is crucial for preventing debris from clogging the drain pump. It’s usually located behind a small access panel at the bottom front of the machine. Before cleaning, ensure the machine is switched off and unplugged. Regularly check and clean the filter to maintain efficient operation and prevent potential issues.
Getting Started: Initial Setup
Before first use, several steps ensure your Hoover washing machine operates safely and efficiently. Crucially, remove all transit bolts – these secure the drum during shipping and must be removed to prevent damage during operation. Locate the bolts at the rear of the machine and follow the instructions for removal, typically requiring a wrench.
Next, connect the water supply using the provided hoses, ensuring a secure fit to both the machine and the water tap. Finally, level the machine using the adjustable feet; an uneven machine can vibrate excessively and cause noise.
Removing Transit Bolts
Essential for safe operation, removing the transit bolts is the first step in setting up your Hoover washing machine. These brightly colored bolts secure the drum during transport, preventing damage. Failure to remove them will cause significant noise and potential machine failure.
Locate the bolts – typically four in number – at the rear of the machine. Use the provided wrench (or a suitable alternative) to carefully unscrew and remove each bolt. Retain these bolts for future use if you need to move the machine. Cover the holes with the provided plastic caps for a neat finish.
Connecting Water Supply

Proper water connection is crucial for your Hoover washing machine’s functionality. Locate the water inlet valves – typically one for hot and one for cold water – at the rear of the appliance. Attach the supplied inlet hoses, ensuring the rubber washers are correctly positioned inside the connections.
Screw the hoses firmly onto both the machine’s valves and your home’s water taps. Avoid cross-threading to prevent leaks. Once connected, slowly turn on the water taps and check all connections for any signs of leakage. Tighten further if necessary.
Leveling the Machine
Ensuring your Hoover washing machine is perfectly level is vital to prevent excessive vibration and noise during operation. Use a spirit level on the top of the machine, checking both front-to-back and side-to-side.
Adjust the adjustable feet located at the bottom corners of the appliance. Rotate them clockwise to lower the machine and counter-clockwise to raise it. Continue adjustments until the spirit level indicates a perfectly horizontal position. A stable, level machine will operate more efficiently and quietly, extending its lifespan.

Understanding Wash Programs
Your Hoover washing machine offers a variety of wash programs designed to cater to different fabric types and soiling levels. Familiarizing yourself with these programs ensures optimal cleaning and garment care. The Cotton program is ideal for everyday cotton items, utilizing higher temperatures for thorough cleaning.
For Synthetics, select the appropriate program to protect delicate fibers. A dedicated Delicate/Wool program provides gentle washing at lower temperatures. Explore the Quick Wash options, like the 59-minute cycle, for lightly soiled loads when time is limited. Refer to the program guide for detailed settings.
Cotton Program Details
The Cotton program is your go-to for everyday laundry, effectively cleaning durable cotton fabrics. This program utilizes higher temperatures – typically ranging from 40°C to 90°C – to eliminate dirt and bacteria. Adjust the temperature based on the cotton item’s care label and soil level. For heavily soiled items, opt for a higher temperature.
Spin speed is also adjustable within the Cotton program, allowing you to balance cleaning performance with fabric care. Higher spin speeds extract more water, reducing drying time, but can cause more wrinkles. Pre-wash options are available for exceptionally dirty loads, providing an initial soak and wash cycle.
Synthetics Program Guide
The Synthetics program is designed for washing fabrics like polyester, nylon, and acrylic blends. These materials require gentler treatment than cotton, so this program uses lower temperatures – typically between 30°C and 60°C – to prevent damage and fading. Select a lower temperature for brightly colored synthetics to preserve their vibrancy.
Spin speeds are automatically adjusted on the Synthetics program to protect the fabrics, but you may have some control to customize. Avoid using high spin speeds with delicate synthetics, as this can cause stretching or distortion. This program is ideal for everyday synthetic clothing, ensuring effective cleaning without compromising fabric integrity.
Delicate/Wool Program Instructions
The Delicate/Wool program is specifically engineered for items requiring the utmost care, such as silk, lace, and wool garments. Always use a detergent formulated for delicate fabrics to prevent damage and maintain softness. This program utilizes exceptionally low temperatures – typically around 30°C or colder – and a gentle wash action.
Crucially, select a reduced spin speed or even a ‘no spin’ option to prevent stretching or felting of woolens. Check garment care labels before washing, and consider using a mesh laundry bag for added protection. This program ensures your most treasured and fragile items are cleaned effectively yet gently, preserving their quality and shape.
Quick Wash Options (e.g., 59-Minute Wash)
Hoover washing machines offer several ‘Quick Wash’ programs designed for lightly soiled laundry when time is of the essence. The popular 59-Minute Wash is ideal for a full 10kg load, providing a complete wash cycle in under an hour – perfect for busy households. Other quick options may include a 30-minute or 15-minute cycle for smaller, less dirty loads.
These programs utilize higher water flow and agitation to expedite the cleaning process. However, remember that quick washes are best suited for everyday items and may not be sufficient for heavily stained or soiled clothing. Always check the load size and soil level before selecting a quick wash option.
Using Special Features
Your Hoover washing machine boasts several special features designed to enhance your laundry experience. The Delay Start function allows you to set a delayed wash cycle, convenient for scheduling washes around your daily routine or taking advantage of off-peak energy rates. Temperature Adjustment provides control over the wash temperature, catering to different fabric types and stain levels.
Spin Speed Selection lets you customize the spin cycle, reducing wrinkles for delicate items or maximizing water extraction for quicker drying. Explore these features via the front panel controls to tailor each wash to your specific needs, ensuring optimal cleaning and fabric care.
Delay Start Function
The Delay Start function on your Hoover washing machine offers exceptional convenience. This feature allows you to pre-set a start time for your wash cycle, enabling you to schedule laundry around your commitments or benefit from lower energy tariffs during off-peak hours. To activate, simply press the ‘Delay Start’ button repeatedly to select the desired delay duration, typically in hours.
The display will indicate the estimated start time. Once set, the machine will automatically begin the wash cycle at the programmed time. Remember to add detergent before setting the delay, ensuring everything is ready for a timely and efficient wash.
Temperature Adjustment
Adjusting the wash temperature is crucial for optimal garment care and stain removal. Your Hoover washing machine provides a range of temperature options, typically displayed on the control panel as degrees Celsius (°C) or Fahrenheit (°F). Lower temperatures (30°C or cold wash) are ideal for delicate fabrics and preventing color fading, while higher temperatures (60°C or 90°C) are effective for sanitizing and tackling stubborn stains;
To modify the temperature, press the dedicated ‘Temperature’ button until the desired setting appears on the display. Always check the care label of your garments before selecting a temperature to avoid damage.
Spin Speed Selection
Spin speed significantly impacts the moisture content of your laundry. Higher spin speeds (measured in revolutions per minute – RPM) extract more water, reducing drying time, but can cause more wrinkles. Lower spin speeds are gentler on delicate fabrics, minimizing creasing and damage. Your Hoover washing machine offers a variety of spin speed options, typically ranging from 400 to 1600 RPM.
To select the spin speed, use the ‘Spin’ button on the control panel. Consider the fabric type: synthetics and delicates benefit from lower speeds, while cottons can withstand higher speeds. A ‘No Spin’ option is also available for hand-wash items.
Cleaning & Maintenance
Regular cleaning ensures optimal performance and longevity of your Hoover washing machine. Exterior surfaces should be wiped down with a damp cloth and mild detergent. Avoid abrasive cleaners which can cause damage. Interior maintenance focuses on the drum, filter, and detergent drawer.
Monthly drum cleaning is recommended; use a washing machine cleaner or a hot wash cycle with vinegar. The filter traps lint and debris, requiring periodic cleaning to prevent blockages. The detergent drawer should be removed and rinsed regularly to prevent build-up.
Cleaning the Drum
Maintaining a clean drum is crucial for preventing odors and ensuring effective washing. Monthly cleaning is recommended, even with regular use. Utilize a dedicated washing machine cleaner, following the product instructions carefully. Alternatively, run an empty hot wash cycle with two cups of white vinegar.
Ensure the drum is empty before initiating the cleaning cycle. After the cycle completes, leave the door ajar to allow for ventilation and prevent moisture build-up. For stubborn residue, repeat the cleaning process or increase the vinegar quantity slightly.
Filter Cleaning Procedure
Regular filter cleaning prevents drainage issues and maintains washing performance. Locate the filter access panel, typically at the front bottom of the machine. Prepare a shallow container and towels to catch any residual water. Carefully unscrew and remove the filter cap, slowly to control water flow.
Clean the filter thoroughly, removing lint, debris, and small objects like coins or buttons. Rinse the filter under running water until it’s clear. Inspect the filter housing for any obstructions and remove them. Reinstall the filter cap securely, ensuring a tight seal to prevent leaks.
Detergent Drawer Cleaning

A clean detergent drawer ensures optimal detergent distribution and prevents residue buildup. Remove the drawer by pressing the release button or lever, usually located on the top. Rinse each compartment – pre-wash, main wash, and softener – under warm running water. Use a soft brush to scrub away any stubborn detergent or fabric softener deposits.
Check the drawer housing within the machine for blockages and clean thoroughly. Ensure all compartments are free of residue before reinserting the drawer. Dry the drawer completely before placing it back into the machine. Regular cleaning, ideally monthly, maintains performance.